How to Create a Shopify Store
Do you want to create a Shopify store but don’t know where to start?
Shopify is, by far, one of the best e-commerce platforms due to its ease of use and the number of eCommerce tools it offers.
Surely you have seen examples of successful Shopify stores and you also want to start selling products online.
In this guide, we help you create an online store with Shopify , add products, and customize it according to your style and brand.
Are you ready? Let’s get started!
What is Shopify?
With Shopify , online businesses and entrepreneurs can create an online store from scratch , manage inventory, accept payments, and ship orders, all in one place.
Shopify , founded in 2006, is one of the most popular online store creators today, occupying 25% of the global share of eCommerce platforms, with 4.8 million active online stores on the Internet according to data from Built With .

Plus, they have the most user-friendly checkout process and offer a wide range of features to manage your business through the Shopify app store .
How to Create a Shopify Store Step by Step
To start creating a Shopify store, the first thing you have to do is create an account . To help store owners, Shopify offers a 3-day free trial + 3-month subscription for $1/mo .
1. Sign up for Shopify
First of all, to start selling on Shopify, you will need to register. You can do it on the official Shopify page .
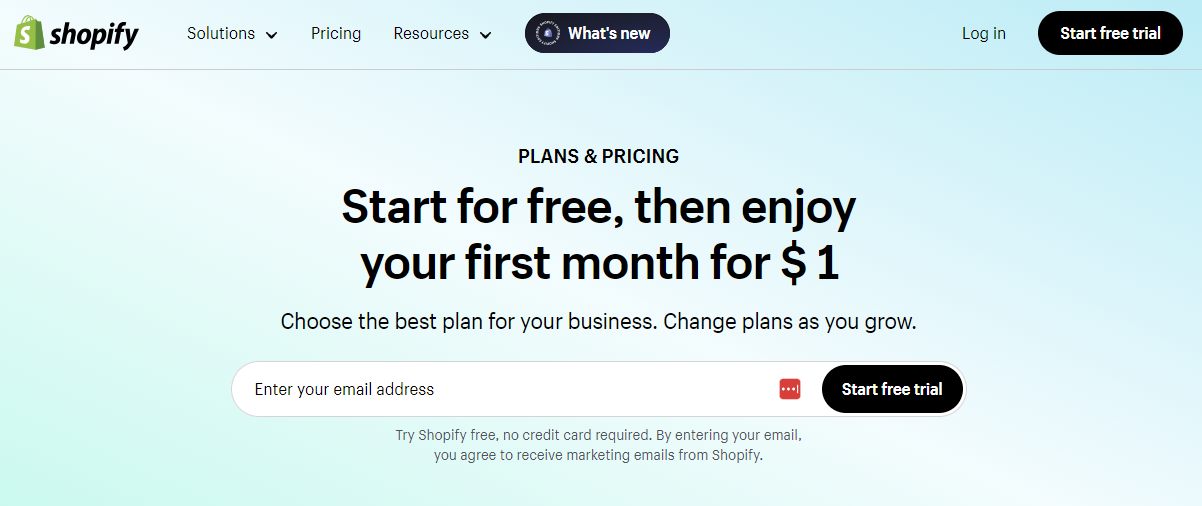
You will only need your email address and some basic information about your business, such as your experience, where your business is located or what you plan to sell. Completing these steps will only take you a couple of minutes.
After all, the last step before starting the Shopify free trial will be to create an account with them. Simply sign up with your Google account or use your email.
!! Congratulations!! 🎉
You’ve already signed up for Shopify. We are on the right track to creating a Shopify store.
Note: You may receive a confirmation email from Shopify asking you to verify your email address. Simply click the link in the email and you’re done.
2. Prepare your content and designs
One of the most common mistakes beginners make when creating a Shopify store is not preparing content and product designs. In our experience, we recommend having the following items prepared:
- Logo.
- Product photographs or videos.
- Brand manual (Typography, colors, graphic elements).
- List of products and their characteristics (price, collections, weight, material, variants, etc.).
- Content for each of your pages (FAQs, About us, contact, legal texts).
If you’re not sure what to sell on Shopify , these are the most common products that merchants sell on this e-commerce platform:
- Products manufactured by you or purchased wholesale.
- Digital products (Music, digital art, NFT).
- Dropshipping products (products that are stored and shipped by a third party).
- Services (Consulting, reservations, advice).
- Print on Demand products (designs printed and shipped by POD companies ).
3. Add Products and Collections
Adding the first product to your Shopify store is very simple. Simply click the “ Add Product ” button from your Shopify admin panel. You can also import products to your Shopify store from a CSV file.
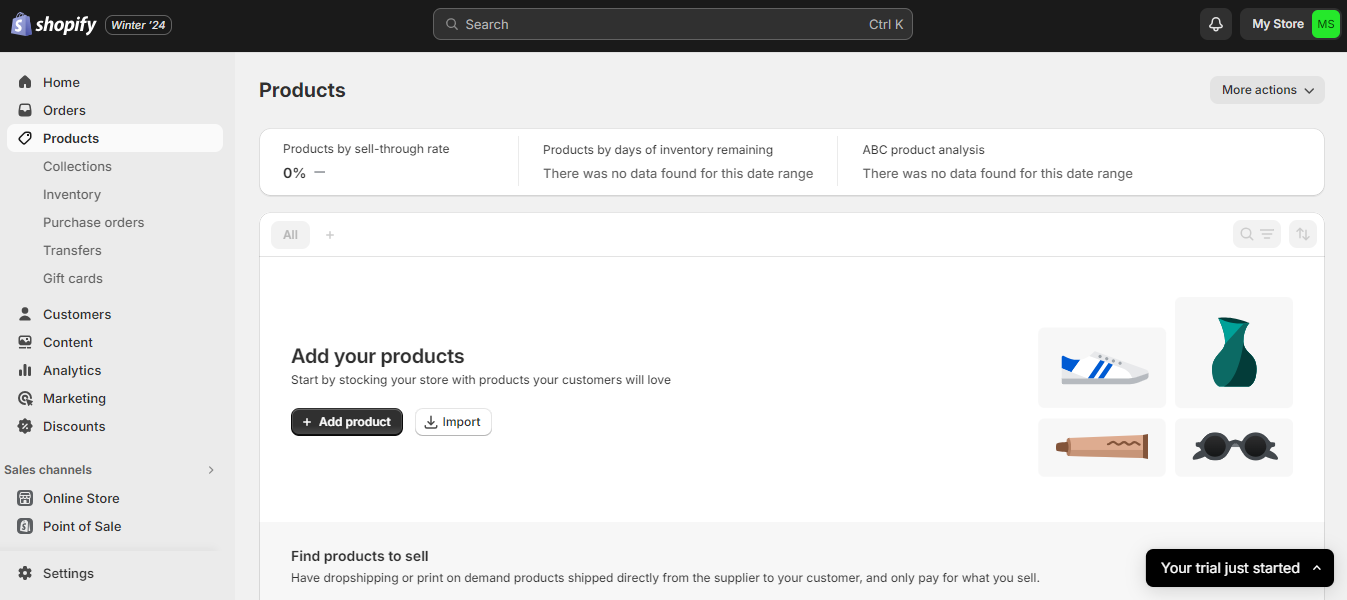
Once you are in the product sheet, you can enter the following data:
- Product name and description (You can use Shopify Magic to create product descriptions through artificial intelligence).
- Price and available inventory.
- Information about shipping and product weight.
- Add variants (such as size or color).
- Title and meta description that will appear in search engines like Google.
- Sales channels (Online store, Shop, physical point of sale) and markets.
- Product category, product type and supplier.
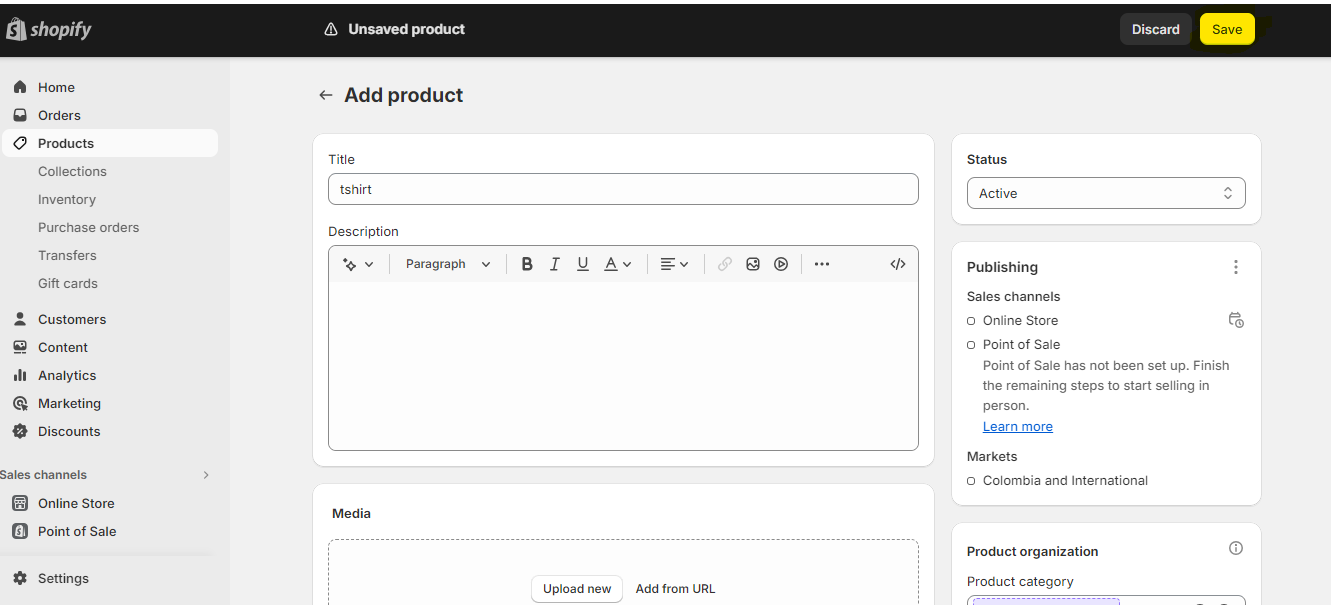
Once you have added all the necessary information about your product, click the “ Save ” button and your product will be added to your online store.
👉 If you feel like you’re stuck somewhere, you can check out our tutorial on how to add products to Shopify .
After uploading products, it’s time to create collections in your Shopify store . Collections are basically sets of products. You can think of them as categories.
- Go to the “ Collections ” section and click on the “ Add a new collection ” button.
- Give the new collection a name, save it, and then add your products.
- Add a title and meta description for search engines.
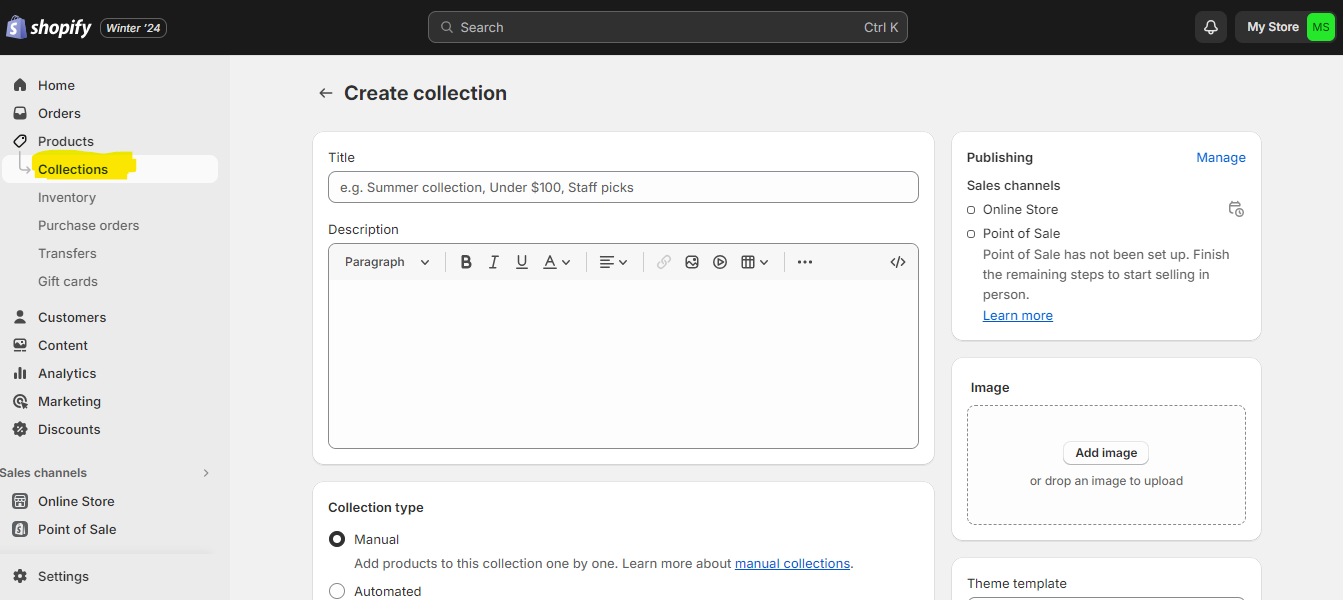
The main objective of collections is to make it easier for your visitors to navigate the store. If you have many products, you can take advantage of automated collections that contain products based on filters.
4. Create essential pages
Aside from the Shopify theme editor , you should also pay attention to the following settings in the Online Store section .
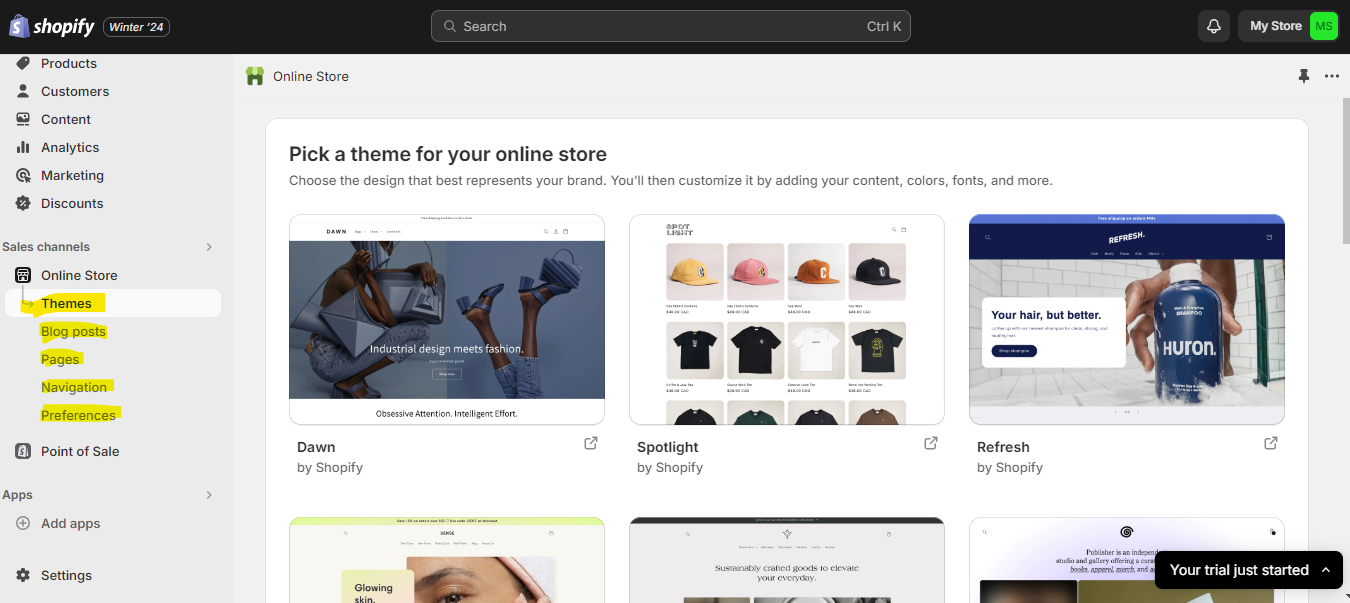
blog posts
A blog post is simply an article that is published to your Shopify store. Shopify has built-in blog tools so you can reach your customers and share valuable information about your business.
pages
At a minimum, your Shopify store should have pages like FAQ, About Us, Contact Page, Privacy Policy, and Terms of Use or Cookie Policy .
To add them go to Shopify Admin > Online Store > Pages > Add Pages .
Once you’ve created your pages, be sure to keep them up to date so they continue to protect you and your customers.
🔍 Consult the guide on 8 types of pages that should not be missing in your online store .
To generate legal pages, you can use Shopify’s privacy policy generator .
Navigation
This section manages menus or lists of links to make it easier for your customers to navigate your online store, such as the header or footer.
Choose the menu that best suits your page ( main or bottom menu ) and click add menu item.
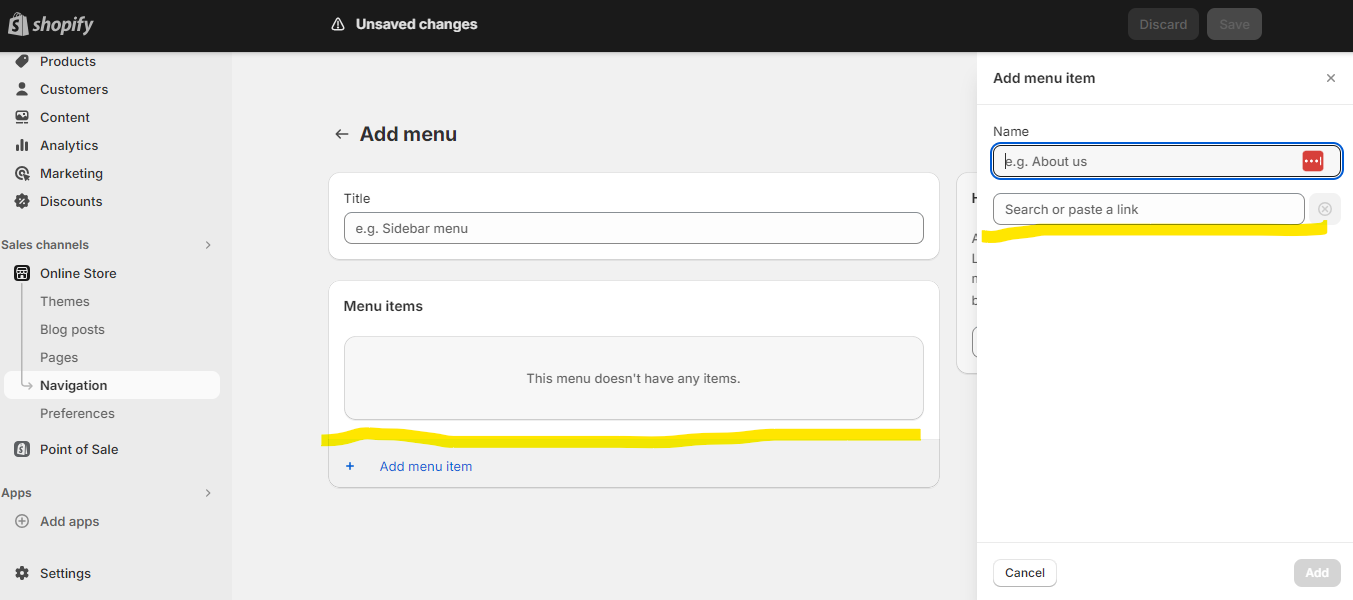
- Name : It is what is shown in the menu. For example, you can name your About Us page as Our Story, Brand Story, How We Create Our Products, or whatever name you want.
- Link : You can search for a link in the list or paste it directly into this box.
preferences
The preferences section is very important, as it allows your online store to be found in search engines like Google.
In your Shopify store preferences, you can:
- Add a title and meta description for the home page of your online store.
- Connect Google Analytics and the Facebook Pixel.
- Set up an image for social networks.
- Configure your privacy or spam protection.
5. Customize your online store
You don’t need to be an expert in web design to create a Shopify store.
To start customizing, go to Online Store > Themes . You will find a selection of free Shopify themes and templates, developed by the platform itself.
Place the cursor on the template you like the most and click “ Customize ”.
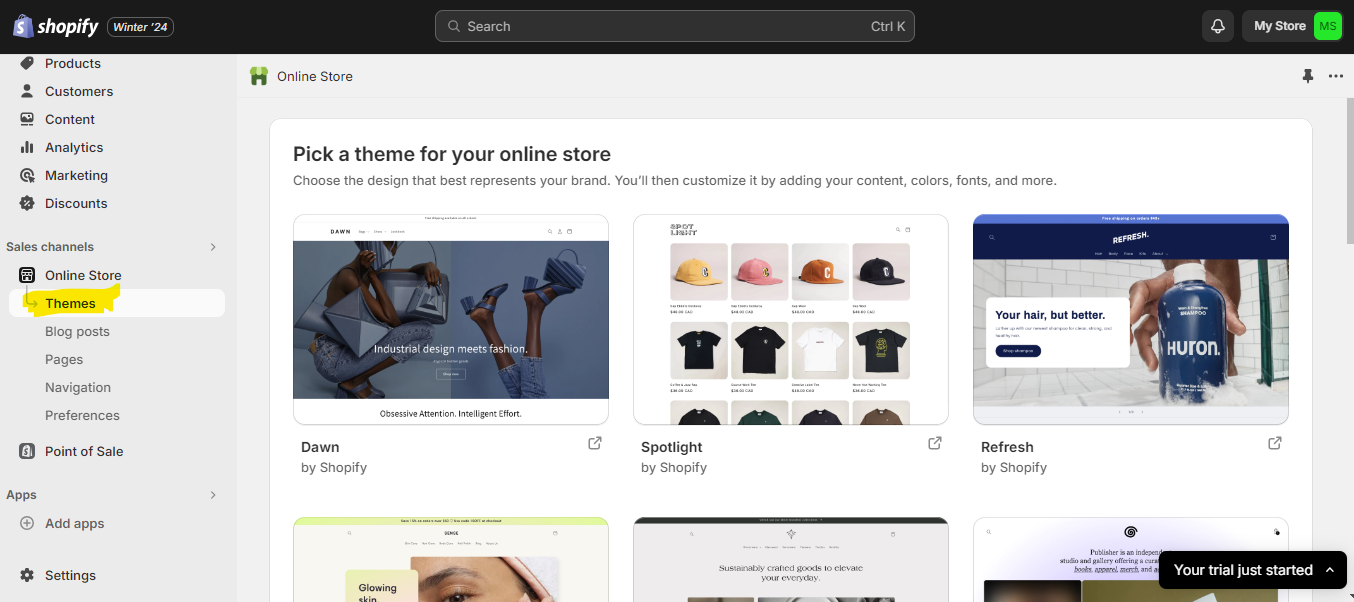
By taking a few minutes to play with the sections and theme settings, you can ensure that your online store represents your brand (logo, content, colors and typography).
There are a wide variety of Shopify themes available, so take your time to look through them all until you find the right one for your online store.
6. Choose a domain name
A domain is the unique address that identifies your online store on the Internet. It is important to choose one that is easy to remember and represents the product you sell and your brand.
To set up your domain, simply click Start > Settings > Domains .
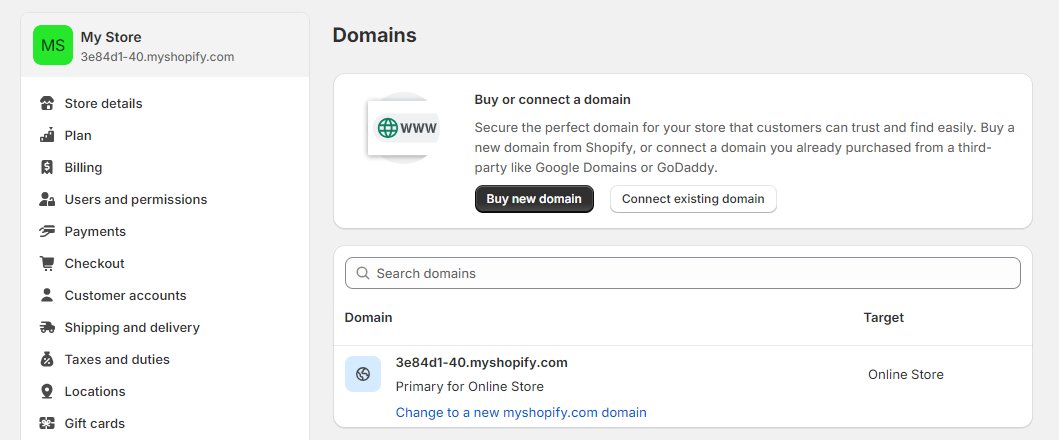
By default, Shopify gives you a sub-domain (yourstore.shopify.com) but it is convenient to register a custom domain name ( yourstoreonline.com ).
Shopify makes it easy to register a custom domain name for your new online store. Click “ Buy new domain ” and search for your domain.
If you already have a domain name registered with a third-party provider like Namecheap , you can also connect it to your Shopify store.
7. Add Shopify Apps
Shopify apps are plugins that you can install on your Shopify store to add more features or functions that are not available by default in Shopify.
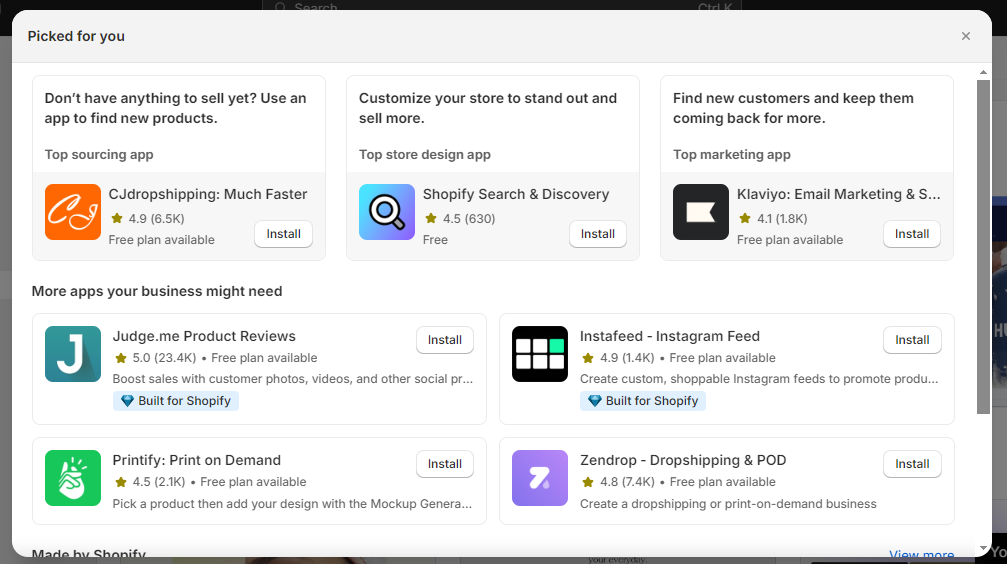
This will depend on the needs of your business. I recommend not installing many applications at the beginning and focusing on offering a quality product.
To help you with ideas on the nitty-gritty, here’s a list of some of the best Shopify apps you should consider installing on your Shopify store:
| Category | Recommended apps |
|---|---|
| Tools to create Landing Pages | GemPages , PageFly |
| Email Marketing Tools | Omnisend , Klaviyo |
| Product Reviews | Judge.me |
| Customer Support | Shopify Inbox (free) or Tidio |
| Loyalty programs | Smile.io |
| Upselling & Cross-Selling | Frequently Bought Together |
| Product suppliers | Printful, Printify, Spocket |
| Social media | Facebook & Instagram, Google & YouTube, TikTok and Pinterest |
8. Set up shipping methods
The next step in creating a Shopify store is configuring shipping methods.
It’s often a complex process, but luckily Shopify has a number of built-in features to make it easier.
To set it up, go to the bottom left of the Shopify admin and Settings > Shipping. Here you can set shipping rates for different regions.
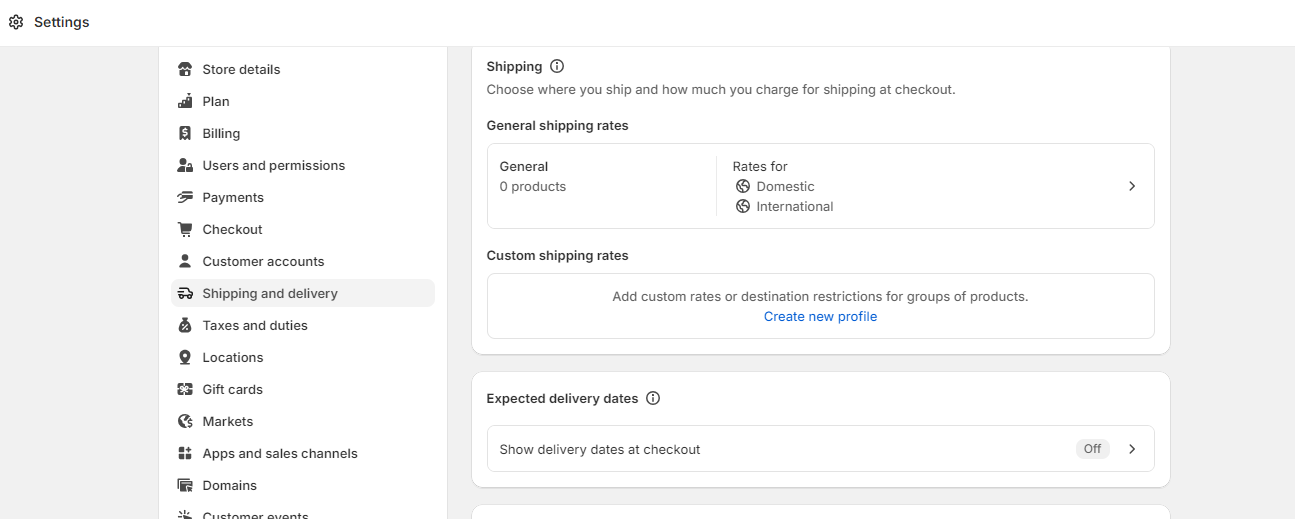
Whether you ship items yourself or use a delivery service, it’s important that you understand the ins and outs of shipping so you can get your products to your customers quickly and efficiently.
👉 To learn more about setting up shipping methods in Shopify head to this guide in the Shopify Help Center .
9. Set up Payments
When you’re ready to launch your Shopify store, you’ll need to choose a payment gateway. There are many options available, so it is important to consider your needs before making a decision.
Shopify Payments
Using Shopify Payments is a great advantage if you want to reduce transaction fees. In addition, it allows you to add payment methods such as Amazon Pay, Apple Pay or Shop Pay .
- Credit card usage rate between 1.6% and 2.4% depending on your subscription plan + 0.30 for online sales.
- Credit card usage rate between 1.7% and 1.4% depending on your subscription plan + 0.00 for in-person sales.
It’s important to note that Shopify Payments is only available in some countries.
PayPal
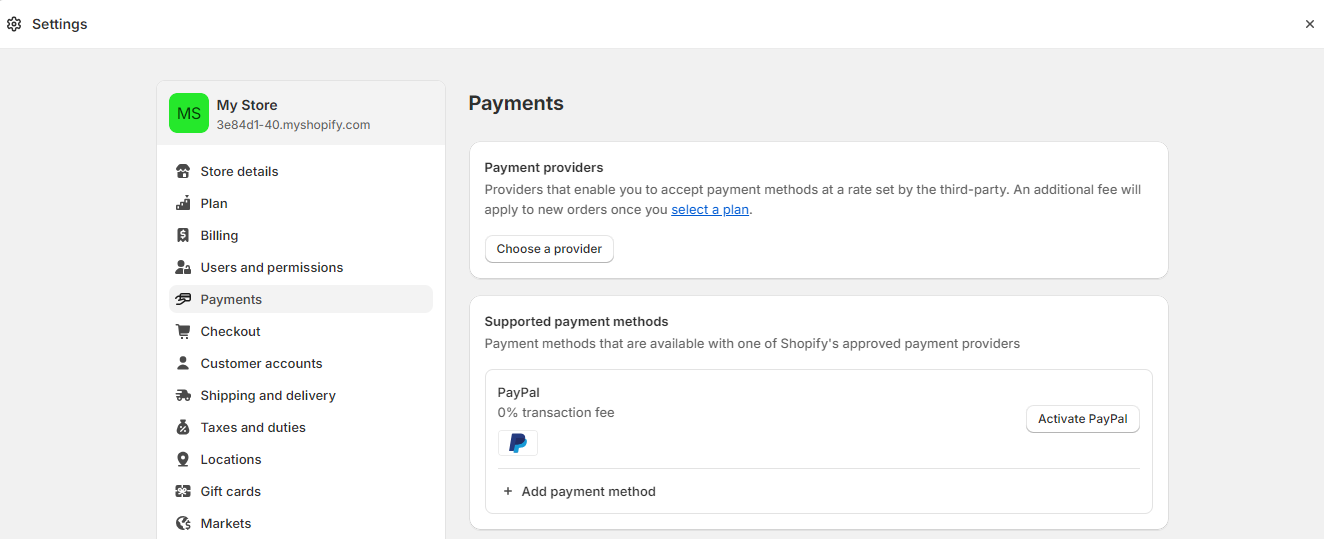
While PayPal works as a third-party payment gateway, there are no transaction fees if you have Shopify Payments enabled.
If you use a third-party provider like Stripe instead of Shopify Payments, transaction fees will apply to purchases processed through PayPal.
Third Party Payment Gateways
To link your payment provider, simply go to Settings > Payments and select the payment provider you want to use.
👉 Check out our list of the best payment gateways before setting one up.
You can add other payment methods such as installment payment solutions, Klarna or Scalapay .
Manual payment methods
This method includes various payment methods , such as bank transfer, money order, cash on delivery, and even creating a custom manual payment method.
10. Publish Online Store
Now that you have a Shopify store, it’s time to open your online store.
Choose a Shopify plan
To do this, go to your Shopify admin > Settings > Plan > and click “ Choose a plan ” to choose the one that best suits your needs.
Shopify’s Basic plan (25 per month) is a good option for individual entrepreneurs and small businesses starting out in e-commerce.
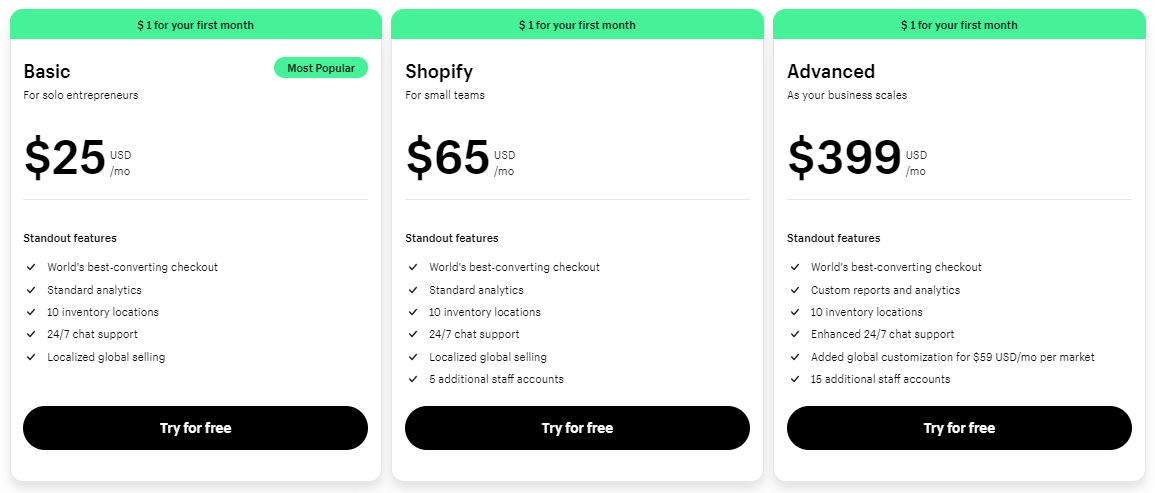
👉 If you’re wondering what the difference is between Basic, Shopify and Advanced subscriptions, check out our comparison of Shopify prices and plans .
Place a trial order
You’ve now set up your Shopify store and it’s time to test it.
Second, create a test order to make sure everything is working correctly.
Follow these easy Shopify steps to place a test order:
- Go to your Shopify dashboard > Settings > Payments .
- If you haven’t already, activate Shopify Payments .
- Once Shopify Payments is activated, click Manage .
- Swipe to the bottom and enable the Test Mode feature .
Check out the different test credit card numbers you can use in the Shopify Help Center.
When testing your Shopify store, make sure that all products are ready for sale, are priced correctly, are well photographed, have accurate descriptions, and that the checkout process is smooth.
Deactivate the password of your online store
Third, remove the password from your Shopify online store. This way anyone can browse and buy.
Navigate from Control Panel > Online Store > Preferences > Password Protection .
After that, type your domain name into an incognito tab and you can see what your online store looks like to visitors.
Promote your online store
If everything looks good, you’re ready to start selling! And now that?
The next challenge will be to promote your online store . Mainly, there are two ways to increase traffic to a website or online store:
- Organically
- Through paid ads.
To generate organic traffic to your online store, you will have to work on different strategies such as content marketing, social media marketing, email marketing, search engine optimization.
To receive paid traffic, you can create paid marketing and advertising campaigns like Facebook ads , Google ads or influencer marketing and get your first sales.
Congratulations on getting this far and taking the first step to selling your products online! 🎉

